Foundry Quickstart
Short recipes for smart contract interactions with Circom, Gnark, and Noir.
Foundry is a leading framework for interacting with smart contracts. The official developer docs are an excellent learning resource, and due to the framework's popularity, many alternative quickstart guides exist. This tutorial is intended specifically for developers interested in smart contracts that verify zero-knowledge proofs. In this guide, we will demonstrate how to interweave usage of the Sindri CLI and Foundry in order to quickly get started developing applications involving on-chain verification.
Here's our agenda:

The sequence of commands to test a verifier.
While the roadmap above will not change based on your circuit frontend framework (Circom, Gnark, and Noir), the smart contract artifacts will. Make sure the tabs on this page match your preferred framework choice.
Dependencies
The main tools we take advantage of are:
- Sindri CLI - For deploying and proving ZKP circuits.
- Foundry - For deploying and transacting with ZKP verifiers.
In order to transorm proofs into transaction calldata format, we will also need two fairly standard Unix utilities:
- jq - A JSON parser we'll use to turn ZKPs into calldata
- bc - A command-line calculator to encode big integers as hexidecimal strings (only used for Circom)
In most cases, you can install the two tools above via some variation of sudo apt-get (Linux) or brew (Mac).
Phase 1 - Assemble Local Codebase
Initialize a Forge Project
You will need to create an empty directory in order to initialize the standard project template.
forge init
Your directory tree should now look like the following. We have annotated the purpose of the main subdirectories.
📦My_Directory
 ┣ 📂.github
 ┣ 📂lib                   # dependencies (we won't add any)
 ┃ ┗ 📂forge-std
 ┣ 📂script                # custom transaction logic (deployment scripts go here)
 ┃ ┗ 📜Counter.s.sol
 ┣ 📂src                   # directory for smart contract source code (verifiers go here)
 ┃ ┗ 📜Counter.sol
 ┣ 📂test                  # testing logic (we won't add any)
 ┃ ┗ 📜Counter.t.sol
 ┣ 📜.gitignore
 ┣ 📜.gitmodules
 ┣ 📜README.md
 ┗ 📜foundry.toml
Create a Circuit
We use the CLI to make a circuit from scratch, but it is also fine to start from your own. See the following links for circuit requirements for Circom, Gnark, or Noir.
- Circom
- Gnark
- Noir
For Circom circuits, smart contract generation is possible from any combination of options (e.g. WASM/C++) within the sindri init template.
In the example below, we give our project the name circuit/.
sindri init circuit
 <omited menu choices>
cd circuit
sindri deploy
For Gnark circuits, both the Groth16 and PlonK proving backends are supported.
However, only the bn254 curve is compatible with smart contract generation.
Ensure that you select that curve when prompted.
In the example below, we give our project the name circuit/.
sindri init circuit
 <omited menu choices>
cd circuit
sindri deploy
For Noir circuits, smart contract generation is possible from any combination of options (e.g. v0.22.0, v0.23.0 etc.) within the sindri init template.
In the example below, we give our project the name circuit/.
sindri init circuit
 <omited menu choices>
cd circuit
sindri deploy
In addition to creating a new circuit locally, the final command above compiled that circuit via Sindri's API.
Download the Smart Contract
As a result of our circuit compilation (the sindri deploy command above), we now have access to a smart contract which verifies any proof from Sindri's API using this circuit.
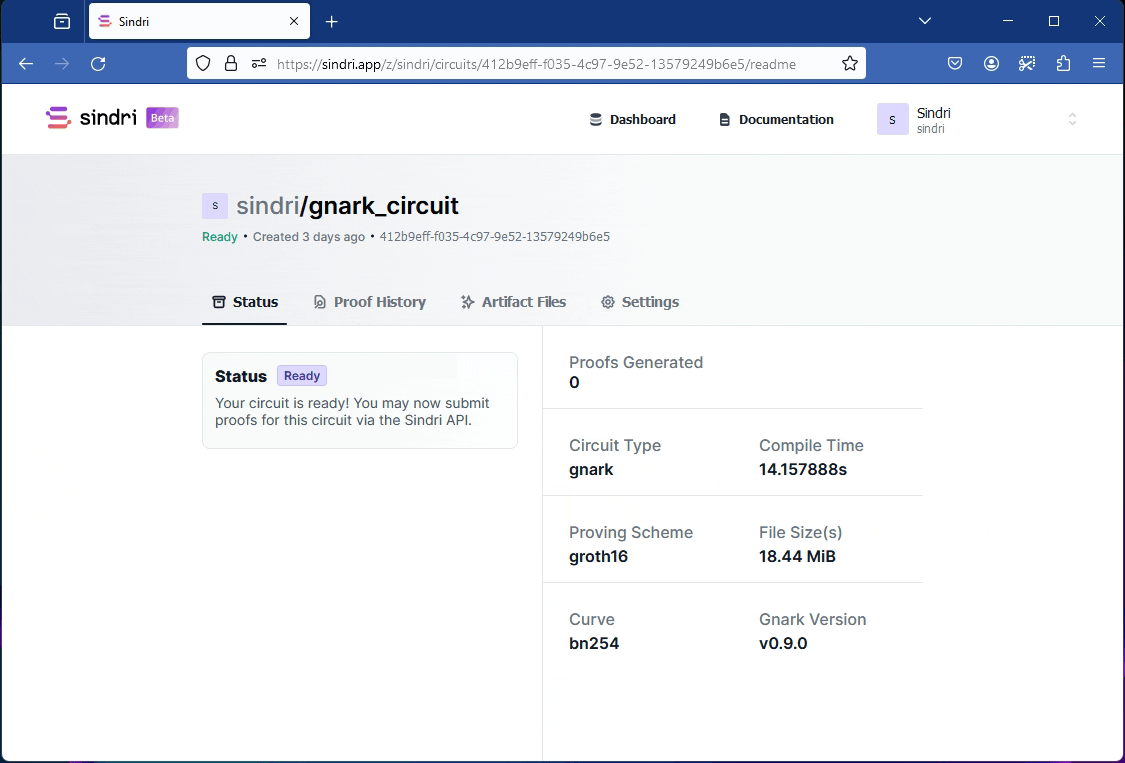
In order to retrieve that circuit, we'll need to log in to Sindri's frontend and navigate to the compiled circuit.
After clicking on the project name (that was decided during the sindri init command), you'll be taken to the homepage for that circuit.
The GIF below indicates where to find the download button for our smart contract 👇.
Downloading a circuit's smart contract.
If you re-deploy an existing circuit project via Sindri's API, make sure to download a new smart contract verifier, as the verification key may have changed!
After the contract downloads (as a text file), you will need to open that text file in an editor copy the contents over to our Forge project at /src/Verifier.sol.
Below, we have abridged versions of all of the contracts.
- Circom
- Gnark
- Noir
This solidity code produces two contracts: Pairing and Verifier.
In our deployment script, we only need to refer to the Verifier contract.
//
// Copyright 2017 Christian Reitwiessner
// SPDX-License-Identifier: GPL-3.0
pragma solidity ^0.8.24;
library Pairing {
    // Elliptic curve operations
}

contract Verifier {
    using Pairing for *;

    // Verifying key and internal function definitions

    function verifyProof(
            uint[2] memory a,
            uint[2][2] memory b,
            uint[2] memory c,
            uint[2] memory input
        ) public view returns (bool r) { }
}
In order to call the specific function we are interested in later on, we should export that variable now. Within a terminal (the same one you will use during Phase 2), type
export FUNCTION="verifyProof(uint[2],uint[2][2],uint[2],uint[2])"
If the number of public inputs of your circuit is different from our scaffold example, then the last variable above may have a different length.
If you created a Gnark circuit with the PlonK backend, your contract will look slightly different from the codeblock below.
The most notable difference is that the smart contract is called PlonkVerifier instead of simply Verifier.
Additionally, the function signature we need to save in the variable FUNCTION is Verify(bytes, uint256[]).
In our deployment script, we will need to use the name of the Verifier contract defined below.
// SPDX-License-Identifier: MIT

pragma solidity ^0.8.0;

/// @title Groth16 verifier template.
/// @author Remco Bloemen

contract Verifier {

    error PublicInputNotInField();
    error ProofInvalid();

    // Internal functions

    function verifyProof(
        uint256[8] calldata proof,
        uint256[1] calldata input
    ) public view { }
}
In order to call the specific function we are interested in later on, we should export that variable now. Within a terminal (the same one you will use during Phase 2), type
export FUNCTION="verifyProof(uint256[8],uint[2])"
If the number of public inputs of your circuit is different from our scaffold example, then the last variable above may have a different length.
This solidity code produces a verification key library contract UltraVerificationKey, a base class Contract BaseUltraVerifier and an implementation of that base class UltraVerifier.
In our deployment script, we only need to refer to the UltraVerifier contract.
// Verification Key Hash: 43d5549c74bd6446f77a259476a78fc02c0339e8f9af6cdb5ab02b24f48c54fb
// SPDX-License-Identifier: Apache-2.0
// Copyright 2022 Aztec
pragma solidity >=0.8.4;

library UltraVerificationKey {
    // Verification key definition
}

abstract contract BaseUltraVerifier {
    function verify(bytes calldata _proof, bytes32[] calldata _publicInputs) external view returns (bool) { }
}

contract UltraVerifier is BaseUltraVerifier {
    // Override some verification key definitions in base class
}
In order to call the specific function we are interested in later on, we should export that variable now. Within a terminal (the same one you will use during Phase 2), type
export FUNCTION="verify(bytes,bytes32[])"
Phase 2 - Interact on a Testnet
Now that we have assembled all of the necessary pieces, we are ready to perform an end-to-end test of verifying a zero-knowledge proof.
In the guidance below, we will use the standard configuration of anvil that is shipped with Foundry to run a local Etherum node.
Depending on the network you are interested in simulating, you may find it useful to see the other configuration options anvil allows.
Type anvil -h for more information on those options.
Launch local devnet
In a standalone terminal, type anvil to launch the testnet.
(Do not close this tab until the experiment is complete!)
After initializing, the utility will print out some accounts prepopulated with tokens.
We will need to save the private key for one of these accounts in order to deploy and transact with a contract.
In the same terminal that you saved the contract function variable in during Phase 1, save the following two variables.
export PRIVATE_KEY=0xac0974bec39a17e36ba4a6b4d238ff944bacb478cbed5efcae784d7bf4f2ff80
export RPC_URL=127.0.0.1:8545
These are example values obtained from the standard anvil configuration.
The values you use should be obtained from the printout you see after launching anvil.
Compile & Deploy the Verifier
We will compile the solidity code and deploy it to our anvil testnet via one script, which we add to the script/ directory.
Among the three frameworks, the deployment script will only need to be altered to provide the name of the main smart contract.
You should copy the contents below and save them in script/Deploy.sol.
- Circom
- Gnark
- Noir
// SPDX-License-Identifier: UNLICENSED
pragma solidity ^0.8.13;

import { Script } from 'forge-std/Script.sol';
import { Verifier } from 'src/Verifier.sol';

contract DeployScript is Script {
function setUp() public {}

    function run() public {
        vm.startBroadcast();
        new Verifier();
        vm.stopBroadcast();
    }

}
If you created a Gnark circuit with the PlonK backend, your deployment script should import PlonkVerifier.
// SPDX-License-Identifier: UNLICENSED
pragma solidity ^0.8.13;

import { Script } from "forge-std/Script.sol";
import { Verifier } from "src/Verifier.sol";

contract DeployScript is Script {
    function setUp() public {}

    function run() public {
        vm.startBroadcast();
        new Verifier();
        vm.stopBroadcast();
    }
}
// SPDX-License-Identifier: UNLICENSED
pragma solidity ^0.8.13;

import { Script } from 'forge-std/Script.sol';
import { UltraVerifier } from 'src/Verifier.sol';

contract DeployScript is Script {
function setUp() public {}

    function run() public {
        vm.startBroadcast();
        new UltraVerifier();
        vm.stopBroadcast();
    }

}
To invoke the deployment script, we will need to use the command below.
forge script script/Deploy.sol --rpc-url $RPC_URL --private-key $PRIVATE_KEY --broadcast
The final --broadcast option is needed to ensure the script actually deploys to our anvil testnet rather than just simulating the transaction.
While execution is in progress you should see the estimated gas price, followed by a transaction progress bar.
When the receipt has come back, make anvil-hardhat indicates that the transaction was successful.
##### anvil-hardhat

✅ [Success]Hash: 0xe277fafe3a55383dc32959de54cc9957fa48ef344e3c670004549e91bf3cc302
Contract Address: 0xbdEd0D2bf404bdcBa897a74E6657f1f12e5C6fb6
Block: 1
Paid: 0.00255667 ETH (2556670 gas \* 1 gwei)
We will want to save the contract address so that we know where to send a transaction in the next step. For the example output above, we would type
export ADDRESS=0xbdEd0D2bf404bdcBa897a74E6657f1f12e5C6fb6
Transact
In order to invoke our newly deployed contract, we will first use Sindri's API (via the CLI) to create a proof from the example circuit we created in Phase 1. Then, we will have to reformat that proof as calldata.
Create a Proof
The following will move your terminal into the circuit directory (allowing the Sindri CLI to understand what circuit you would like a proof for) and submit a proof request.
We save the response inside a file called proof.json
cd circuit/
sindri proof create -i "example-input.json" > proof.json
Note that if you used your own circuit in Phase 1, you will need to replace the example-input.json file with your own JSON-formatted circuit inputs.
Transform a Proof into Calldata
- Circom
- Gnark
- Noir
Below, we provide a shell script that will transform the contents of proof.json into calldata matching our verifier contract's expectations.
For more information on how to transform proofs into calldata, you can find the official snarkjs guidance here.
This is where we make use of the jq dependency (to parse the proof.json file) as well as bc a command line calculator that will transform the bigint's pi_a, pi_b, and pi_c into hex representations.
#!/bin/bash

to_hex(){
    local instr="$@"
    # bigint to hex rep | uppercase output of bc to lower | pad hex to length 64
    echo 0x$(echo 'obase=16; '$instr | bc | tr '[:upper:]' '[:lower:]' | awk '{print gensub(/ /,0,"g",sprintf("%64s",$0))}')
}
export -f to_hex

# load the string | return the list of big ints (with trivial elements removed) | turn each one into hex | turn space delimiter to comma
proof_a=[$(jq .proof.pi_a[:2] proof.json | jq .[] | xargs -I'{}' bash -c 'to_hex {}' | paste -s -d ',' )]
proof_c=[$(jq .proof.pi_c[:2] proof.json | jq .[] | xargs -I'{}' bash -c 'to_hex {}' | paste -s -d ',' )]

#b should have format [[.,.],[.,.]] which requires an extra step
proof_b=$(jq .proof.pi_b[:2] proof.json | jq 'flatten' | jq .[] | xargs -I'{}' bash -c 'to_hex {}' | paste -s -d ',' )
tmp_b=(${proof_b//,/ })
proof_b=[[${tmp_b[0]},${tmp_b[1]}],[${tmp_b[2]},${tmp_b[3]}]]

public_calldata=[$(jq .public proof.json | jq .[] | xargs -I'{}' bash -c 'to_hex {}' | paste -s -d ',')]

echo $proof_a $proof_b $proof_c $public_calldata
In order to invoke the script above (assuming you have a bash shell interpreter), you can copy the code into a text file (inside the same directory as our proof.json file) and name it transform_calldata.sh.
You might also have to change the file permissions to make it executable (via chmod +x transform_calldata.sh).
Then the last line of the shell script printout can be copied into a calldata variable:
./transform_calldata.sh
  <omited lines from calldata printout>
export CALLDATA="[0x...] ... [0x...]"
Below, we provide a shell script that will transform the contents of proof.json into calldata matching our verifier contract's expectations.
For more information on how to transform proofs into calldata, you can find the official Gnark guidance here.
If you created a Gnark circuit with the PlonK backend, the script below will not transform your proof correctly. You should instead refer to the Noir framework calldata transformation script in the other tab.
#!/bin/bash

# load the string  | interpret the base 64 | translate 256 bytes to hex | split hex into 8 chunks of 64 | tidy up the end
proof_calldata=[0x$(jq .proof.proof proof.json | base64 -di | hexdump -v -n256 -e '/1 "%02x" ' | sed -r 's/(.{64})/\1,0x/g' | sed 's/.\{3\}$//')]
public_calldata=[$(jq .public.Y proof.json)]

echo $proof_calldata
echo $public_calldata
In order to invoke the script above (assuming you have a bash shell interpreter), you can copy the code into a text file (inside the same directory as our proof.json file) and name it transform_calldata.sh.
You might also have to change the file permissions to make it executable (via chmod +x transform_calldata.sh).
Then the last line of the shell script printout can be copied into a calldata variable:
./transform_calldata.sh
  <omited lines from calldata printout>
export CALLDATA="[0x...] [0x...]"
Below, we provide a shell script that will transform the contents of proof.json into calldata matching our verifier contract's expectations.
For more information on how to transform proofs into calldata, you can find the official Noir guidance here.
#!/bin/bash

parse_basic_toml(){
    local instr="$@"
    # Split the toml file at every quotation mark
    IFS='\"' read -r -a elements <<< "$instr"
    # Loop through the elements, keeping only those beginning with "0x"
    filtered_elements=()
    for element in "${elements[@]}"; do
        if [[ $element == "0x"* ]]; then
            filtered_elements+=("$element")
        fi
    done
    echo "${filtered_elements[@]}"
}

# load the string  | remove spare quotation marks | prepend the hex signifier '0x'
proof_calldata=0x$(jq .proof.proof proof.json | tr -d '"')

# load the string | split by newline character
public_calldata=$(jq '.public."Verifier.toml"' proof.json)
public_calldata=$(parse_basic_toml $public_calldata)
public_calldata=(${public_calldata// /,})

echo $proof_calldata [$public_calldata]
The TOML reader function above is brittle, i.e. not designed to handle complicated public variable structs. If your Noir circuit makes use of custom structs (anything that isn't a singleton or list) then you should opt for a dedicated TOML parsing utility.
In order to invoke the script above (assuming you have a bash shell interpreter), you can copy the code into a text file (inside the same directory as our proof.json file) and name it transform_calldata.sh.
You might also have to change the file permissions to make it executable (via chmod +x transform_calldata.sh).
Then the last line of the shell script printout can be copied into a calldata variable:
./transform_calldata.sh
  <omited lines from calldata printout>
export CALLDATA="0x... [0x...]"
We finally have the three necessary variables built up to interact with the deployed contract. In order to send a transaction request (i.e. a proof to be verified), we use the following command:
cast send $CONTRACT_ADDRESS $FUNCTION $CALLDATA --private-key $PRIVATE_KEY --rpc-url $RPC_URL
If the transaction succeeds, then the output of this command is usually pretty uninformative. However, if anything goes wrong, for instance the calldata is formatted incorrectly, then you may see an error output.
Inspect
One way to thoroughly inspect what happened with the transaction initiated above is to use the cast run command which will replay the transaction.
If you record the transaction hash that was printed in the step above and replace it in the command below, you can see the entire call stack.
cast run $TRANSACTION_HASH
All three verification contracts (for Circom, Gnark, and Noir) will output the boolean value 1 if a proof successfully verified.
The example below shows a successful proof verification for Circom.
...
6958101930]) [staticcall]
    │   └─ ← [Return] 0x0000000000000000000000000000000000000000000000000000000000000001
    └─ ← [Return] 0x0000000000000000000000000000000000000000000000000000000000000001